Operating Instructions
Operating modes
- Mentalab Explore has two main operating modes: offline and online. When in offline mode, the amplifier collects data and stores it in internal flash memory. Users can extract the recordings from the memory using a USB-C cable after recording.
- In online mode, data is transmitted via Bluetooth in real-time to a host machine, enabling the user to collect, monitor, and visualize data. In this mode, you can also measure impedances, and configure the amplifier with Explore Desktop,
explorepy, or Explore Mobile). In online mode, the Explore amplifier sends signal data to the host machine. It also sends meta-data when the amplifier’s settings change. - We recommend charging the amplifier for at least one hour before first use. To charge the amplifier, connect the USB-C cable to a compliant source. A green LED indicates sufficient battery (> 60% charge). After charging, unplug your amplifier from the power source.
Pre-experiment checklist
We strongly recommend completing this checklist before you start collecting EEG data. This will ensure you get the best out of your Explore system.
1. Install software
- Install the software appropriate for your needs. An overview of our open-source APIs can be found on the software page of our website or in our GitHub Repo.
- To verify impedances, you will need
explorepy,Explore DesktoporExplore Mobile. To downloadexplorepy, please consult ourexplorepyInstallation Guide. Alternatively, you can use our user-friendly mobile app Explore Mobile or desktop application Explore Desktop.
2. Set-up equipment
- Place the measurement electrodes on your subject in your preferred configuration. Each channel (1 – 8; 1 – 16; 1 – 32) is recorded against the reference electrode. For convenience, channel names are marked with tags.
- Push the button to turn on your Explore system. At system start, the LED will illuminate blue. This indicates the amplifier is booting up. After boot up, the LED will present battery information (green: > 60%, yellow: 30 – 60%, red: < 30% charge remaining). Use Explore Desktop, Explore Mobile or
explorepyto check the exact battery charge. - Upon normal start up, the amplifier begins to record to flash memory immediately. It starts advertising and waits for a Bluetooth connection to a host machine. During advertising mode, the LED blinks blue twice per second. If no connection is established within four minutes, the amplifier will automatically change to offline mode. In this state, the LED blinks green once every 3 seconds. Explore will keep recording data to internal memory.
3. Place the REF electrode
- Position: For most EEG applications, we recommend placing the REF on the mastoid (TP9 or TP10). This will minimize artifacts from non-relevant brain activity, EMG, and ECG activity.
- Application: Clean the mastoid with alcohol and abrasive gel. Either tuck the REF electrode under the EEG cap behind the ear (you can use tape here), or use the TP9 or TP10 positions in the EEG cap.
- Gel electrodes: Apply a generous amount of conductive gel onto the REF electrode.
- Dry electrodes: Apply diluted disinfectant onto the recording position. If you have trouble lowering overall impedances, you can apply a little conductive gel or paste to the REF electrode.
4. Check impedances
- Before anything, if you are using the Explore Desktop application, ensure that you first view the signal using the signal pane before moving to the impedance measurement.
Unlike your raw ExG data, impedance measurements are fully online and so are prone to Bluetooth errors. Bluetooth uses the same frequency band as WiFi and ISM (Industrial Scientific and Medical). Additionally, old electronic devices can radiate disturbing frequencies.
If there is too much noise, your impedance measurements will be wrong. Aim to reduce noisy signals.
- The lower the impedances, the higher the signal quality. Verify good impedances before recording. You can visualise impedances by using Explore Desktop or Explore Mobile To learn how to stream impedance data via explorepy, see our
explorepydocumentation.
You are now ready to start recording EEG data. For information on how to visualize and record data using explorepy see our documentation.
5. Access recordings on the device
Your device records all acquired data to its internal memory, whether you connect to it using explorepy, Explore Desktop or you are using it offline. These recordings can be recovered from the device’s memory. To do so, follow these steps:
- Turn the device off
- Connect your device to your computer using a USB data cable (such as the one you have received with your Explore device)
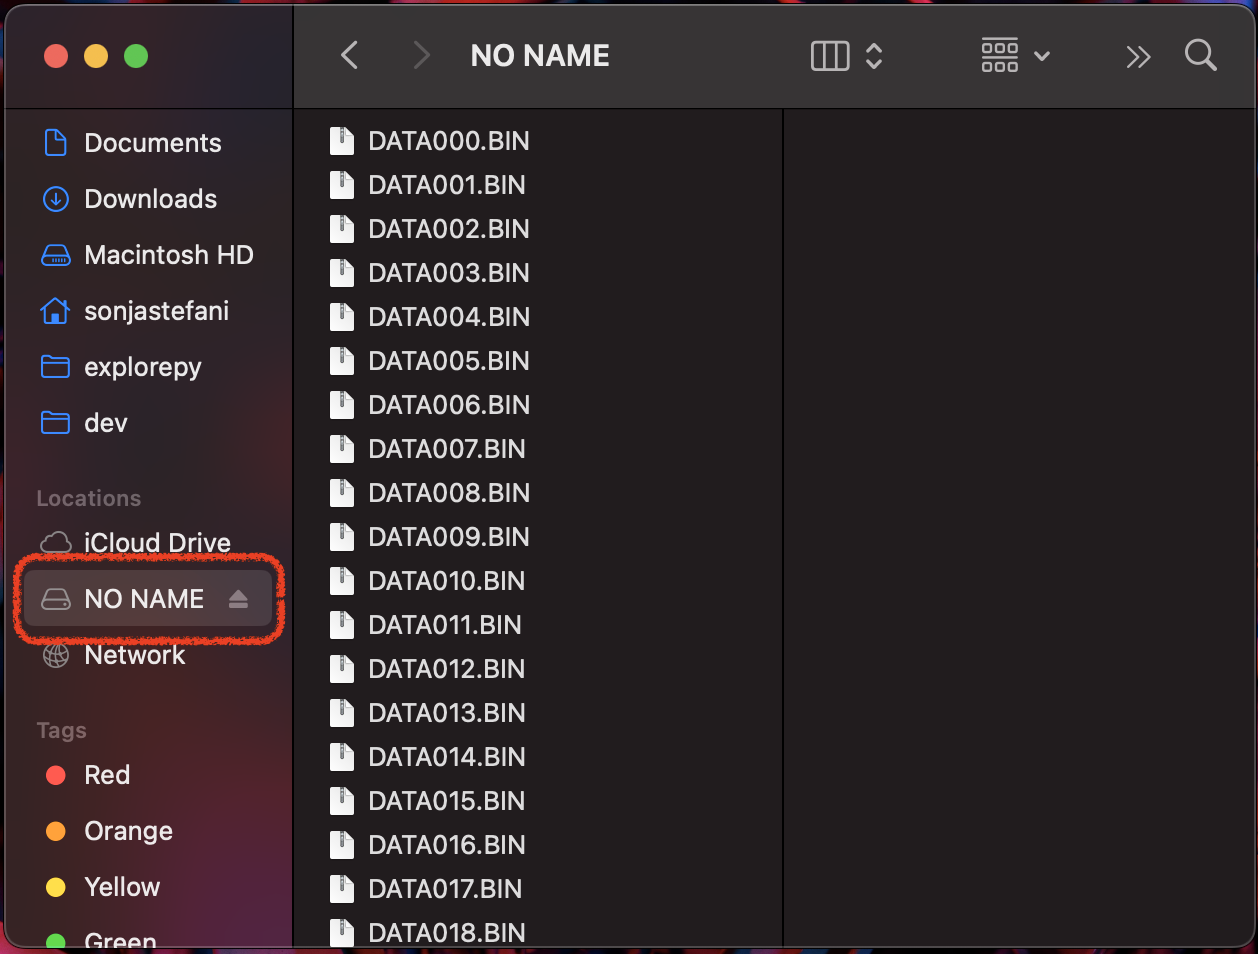
- Your device will now show up on your computer as a storage device, use a file browser to navigate to the device’s storage
- Select the binary recordings you want and copy them to a location on your computer
The recordings are in binary format, you can use Explore Signals to convert the files to .csv or .bdf. You can refer to the respective section in the Explore Signals User Guide for more help.