Recording
Record data in real time to EDF (BDF+) or CSV by selecting Record on the Visualization page.
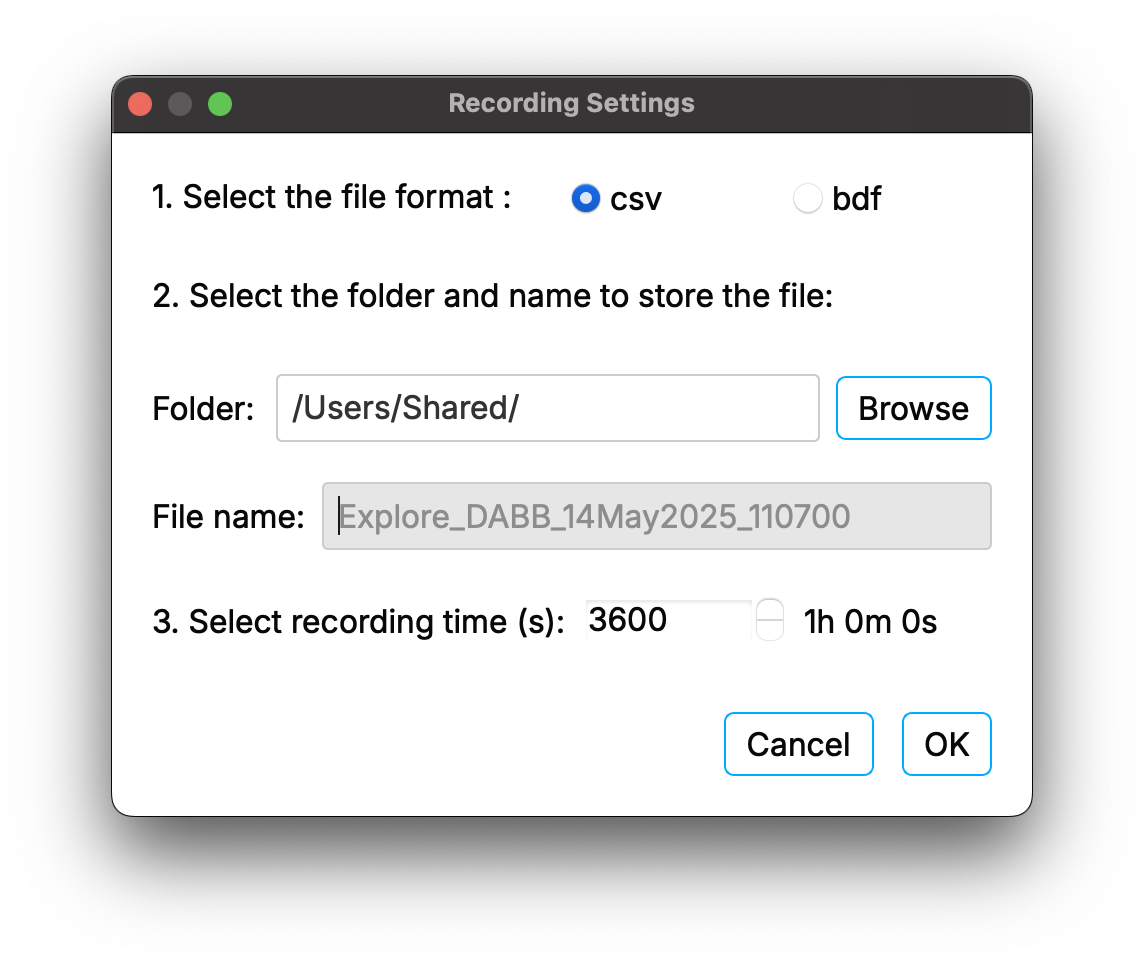
A pop-up will allow you to configure your recording.
Settings include:
- File format – select the output file type (EDF or CSV):
- CSV mode generates an extra file for the marker events
- BDF mode records data in BDF+ format (in 24-bit resolution)
- Folder and name prefix – select where to store files and the file prefix. For example, if the prefix is
test, data will record in three separate files:test_ExG.csv,test_ORN.csv, andtest_Marker.csv. These files will contain ExG data, orientation data, and event markers. - Recording time (in seconds) – set the duration of the recording. You can stop recording at any time by clicking Stop.- Filters.

You can inspect ongoing recording while recording. Go to Tools-> Inspect ongoing recording. Then zoom in/out with mouse hover on X or Y axis
Because environmental factors, like temperature, can affect your sampling rate, we recommend computing the sampling rate of your recorded data. If you find a deviation between the sampling rate you calculate and Explore Desktop’s sampling rate, resample your signal to correct for drifts. The timestamps in the CSV/EDF file can be used to compute the resampling factor.
If you are setting markers in your recording, record to CSV. Alternatively, push data to LSL and record with LabRecorder. EDF cannot guarantee precise marker timings.
For more information or support, do not hesitate to get in contact at: support@mentalab.com